How to Change or Restore Default Windows 7 Desktop Icons
This will show you how to restore or change the default icon for the Computer, User's Files (user-name Folder), Network, and Recycle Bin desktop icons and all other locations in Windows 7.
Removable drives do not use or have a Recycyle Bin. Files deleted from removable drives are permanently deleted instead.
Here's How:
1. Right click on a empty area of the desktop and click on Personalize. (See screenshot below)
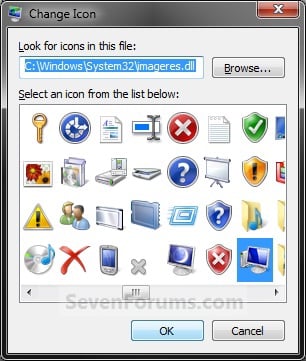
That's it,2. Click on the Change desktop icons link at the upper left corner. (See screenshot below)3. To Change the Icon for a Desktop IconA) In the middle pane, select (click on) a desktop icon that you want to change the icon for, and click on the Change Icon button. (See screenshot below)4. To Restore the Default Icon for a Desktop IconB) Select a icon that you want to use instead, or click on the Browse button and navigate to the location of the icon you want to use.
NOTE: Any icon of your own you want to use instead needs to be a 256x256 pixel .ico Vista style icon file to properly display at larger view settings.C) Go to step 5. A) In the middle pane, select (click on) a desktop icon that you want to restore the default icon for, and click on the Restore Default button. (See screenshot below)5. Click on OK to apply. (See screenshot above or below step 3A)
6. Close the Personalization window. (See screenshot below step 2)
No comments:
Post a Comment